Angular Material provides UI components that work in mobile, web, and desktop too. Angular Material is used to develop the process by reusability of common components like Cards, inputs, Data Tables, etc.
We require the following to install Angular
- Node.js
- npm
- Angular CLI
- IDE for writing the code
Node.js should be greater than 8.11, and npm should be greater than 5.6.
NodeJS:
Type node -v in the terminal to check the Node.js is installed on your system or not. It will help you to see the version of Node.js which is installed in our system.
If the command does not shows any result for the command., it means you have not installed Node. js correctly.
To install Node.js, go through the link https://nodejs.org/en/download/ and download the version which is suitable for your OS.
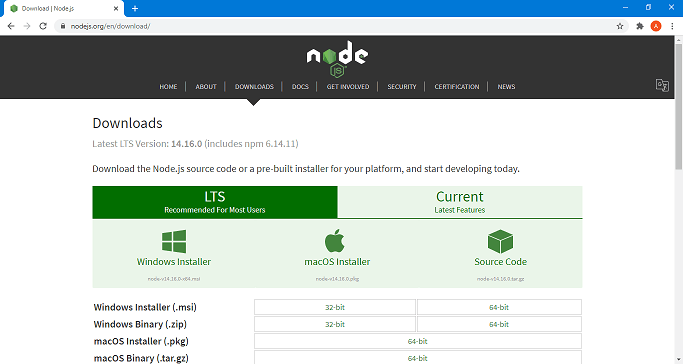
Install the package based on your Operating System. When nodejs is installed, npm will also get installed with it. Type npm -v in the terminal to check if npm is installed or not in our system. It displays the version of npm.
Angular installations are easy with the help of Angular CLI. Visit https://cli.angular.io/ to get the reference of the command.
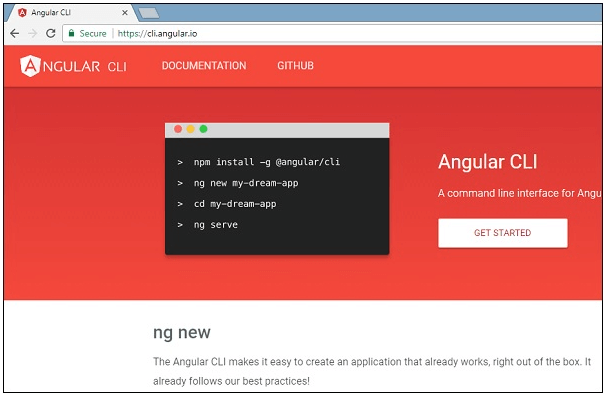
Type npm install -g @angular/cli to install Angular CLI on your system.
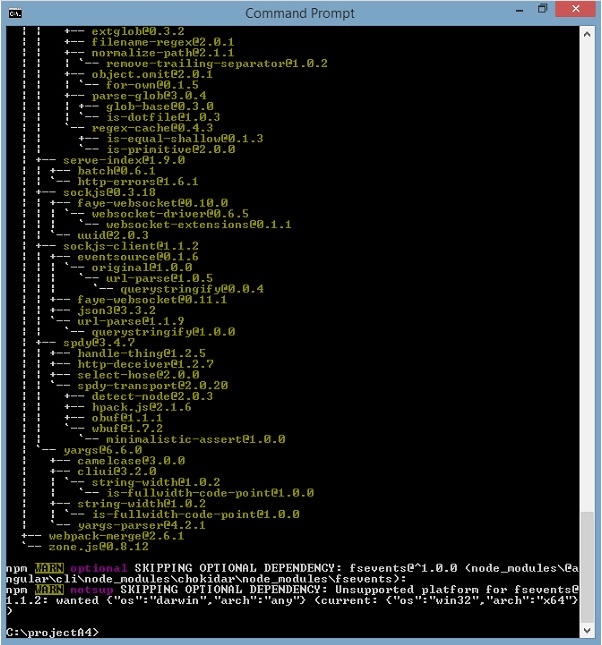
Angular CLI provides the interface as shown above. We can also use IDE such as, WebStorm, Atom, Visual Studio Code, etc.
Installing Angular Material
Step 1: Install the Angular CLI
Install the Angular CLI by using npm:
- npm install -g @angular/cli
Step 2: Create a workspace for Angular Project
Create a workspace:
- ng new angular-material-app
Step 3: Install Angular Material, Angular CDK, and Angular Animations
- npm install @angular/material @angular/cdk @angular/animations --save
The add command will update by using the Angular CLI, perform configuration changes, and execute initialization code.
Step 4: Configure animations
- @NgModule({ imports: [BrowserAnimationsModule], }) export class AppModule { }
Step 5: Import the Angular Material component modules
Import the component modules that are required for the application.
Examples
- import { MatAutocompleteModule, MatCheckboxModule, MatButtonModule, MatFormFieldModule, MatInputModule, MatDatepickerModule, MatRadioModule, MatSelectModule, MatSlideToggleModule, MatSliderModule } from '@angular/material'; @NgModule({ imports: [ MatAutocompleteModule, MatCheckboxModule, MatButtonModule, MatFormFieldModule, MatDatepickerModule, MatRadioModule, MatInputModule, MatSelectModule, MatSlideToggleModule, MatSlideToggleModule ]})
Examples:
Checkbox
- <mat-checkbox>Check </mat-checkbox>
Radio Button
- <mat-radio-group> <mat-radio-button value="1">Male</mat-radio-button> <mat-radio-button value="2">Female</mat-radio-button> </mat-radio-group>
Input
- <mat-form-field class="col-12"> <input matInput placeholder="Name" value="Tudip"> </mat-form-field>
Button
- <button mat-raised-button>Click it</button>
Card
- <mat-card>Material Card</mat-card>
Output:
Step 6: Gesture Support
The components (mat-slider, matTooltip, mat-slide-toggle) believe on HammerJS for using gestures.
- npm install hammerjs --save
Install HammerJS, then import it on the 'main.ts' file.