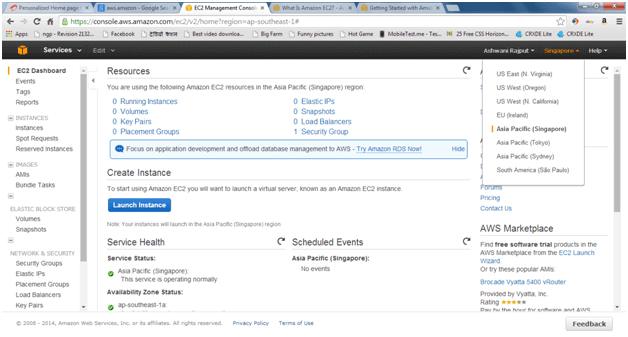
Launch a Windows Instance
You can launch a Windows instance using the AWS Management Console as described following. An instance is a virtual server in the AWS cloud. With the help of Amazon EC2, you can set up and configure the operating system and applications that run on your instance.
To launch an instance

- On console dashboard, click Launch Instance.
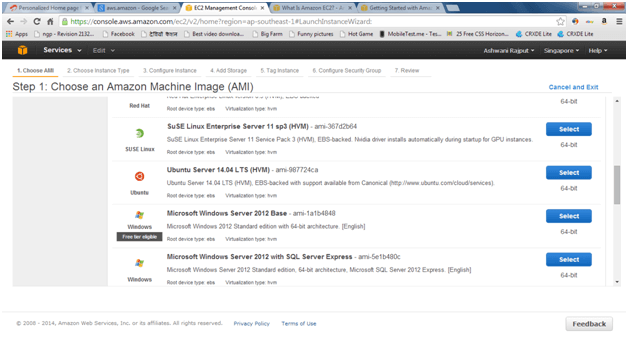
- To Choose an Amazon Machine Image (AMI) page displays a list of basic configurations called Amazon Machine Images (AMIs) that serve as templates for your instance. Select the 64-bit version of Microsoft Windows Server 2008 R2. Notice that this configuration is marked as Free tier eligible.
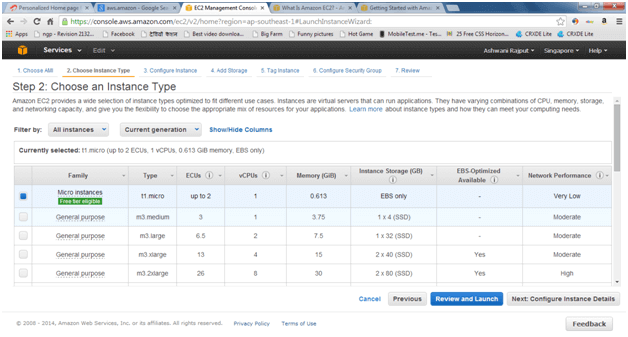
- To Choose an Instance Type page, you can select the hardware configuration for your instance. The t1.micro instance will be selected by default. Click Review and Launch to let the wizard complete or not with other configuration settings for you, so you can get started quickly.
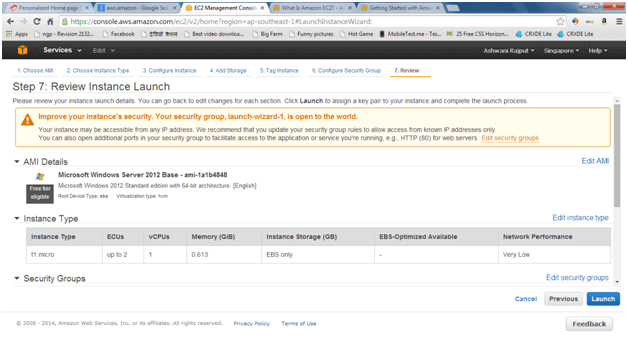
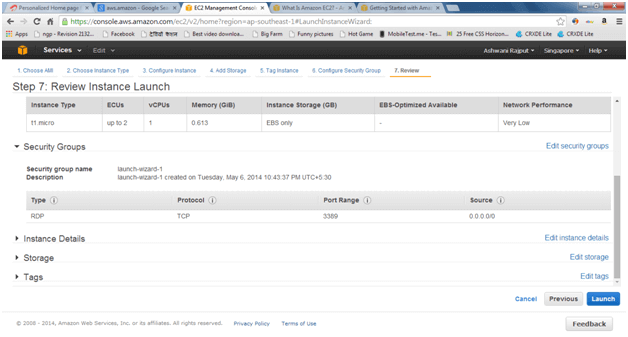
- To Review Instance Launch page, you need to go to the settings for your instance.
Under Security Groups, you will see that the wizard will be created and selected a security group for you. The security group includes basic firewall rules that will enable you to connect to your instance. For a Windows instance, you connect through Remote Desktop Protocol (RDP) on port 3389.
If you have an existing security group then you need to use by clicking Edit security groups, and select your group on the Configure Security Group page. When done, click Review and Launch to return to the Review Instance Launch page.
- In the Select an existing key pair or create a new key pair dialog box, you can select Choose an existing key pair, to select a key pair you already created.
Alternatively, you can create a new key pair. Select Create a new key pair, enter a name for the key pair, and then click Download Key Pair.
This is the only chance for you to save the private key file, so be sure to download it. Save the private key file in a safe place. You'll need to provide the name of your key pair when you launch an instance and the corresponding private key each time you connect to the instance.
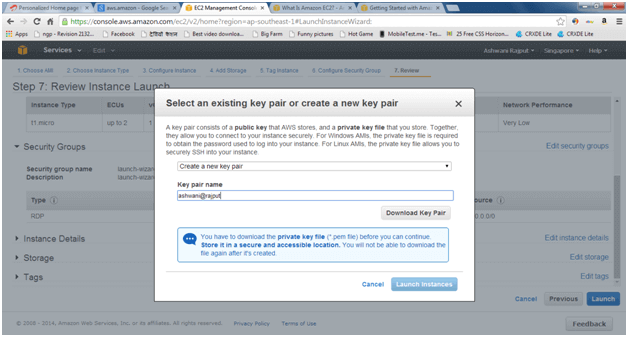
It will be downloaded in the form of .pem file and save it for future purpose.
Attention
Don't select the Proceed without a key pair option. If you launch your instance without a key pair, then you can't connect to it.
When you are ready, select the acknowledgement check box, and then click Launch Instances.
- A confirmation page will open to know that your instance is launching. Click View Instances to close the confirmation page and return to the console.
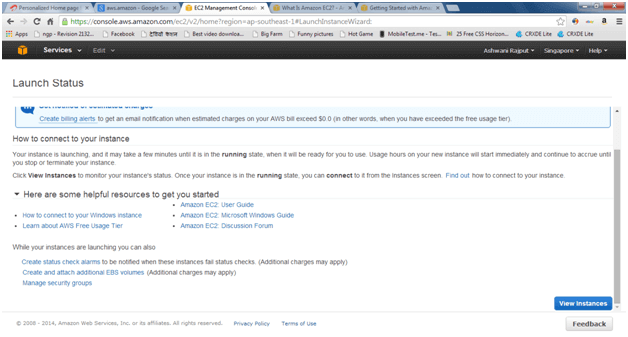
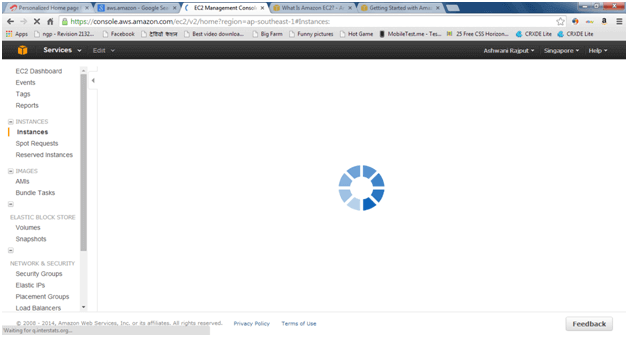
- On the Instances page, you can view the status of the launch. It takes a short time for an instance to launch. When you launch an instance, its initial state is pending. After the instance starts, its state changes to running and it receives a public DNS name.
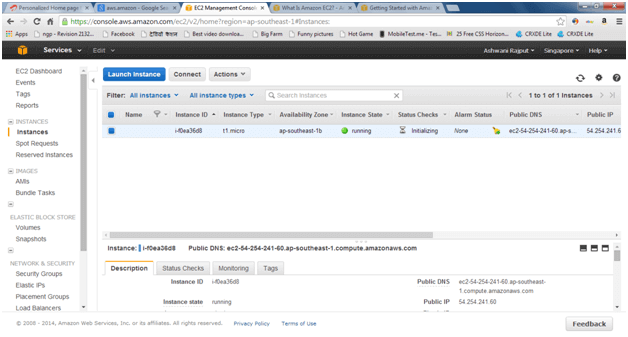
- Record the public DNS name for your instance because you'll need it for the next step.
- (Optional) After your instance is launched, you can view its security group rules. From the Instances page, select the instance. In the Description tab, find Security groups and click view rules.
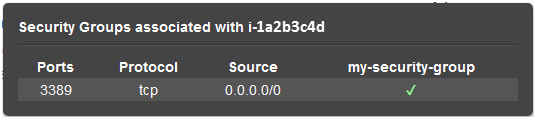
As you can see, if you used the security group the wizard created for you, it contains one rule that allows RDP traffic from any IP source to port 3389. If you launch a Windows instance running IIS and SQL, the wizard creates a security group that contains additional rules to allow traffic to port 80 for HTTP (for IIS) and port 1433 for MS SQL